Monday, December 13, 2021

Red and white embroidered blocks

 Lookee here....I have a finish. hahahaha

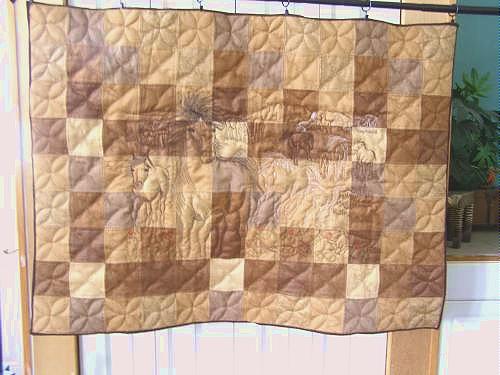
This is my sister's quilt. Took me a couple weeks to quilt it for her. I'm slow these days. I used red and white thread to match and some days my eyes could see better than others. 

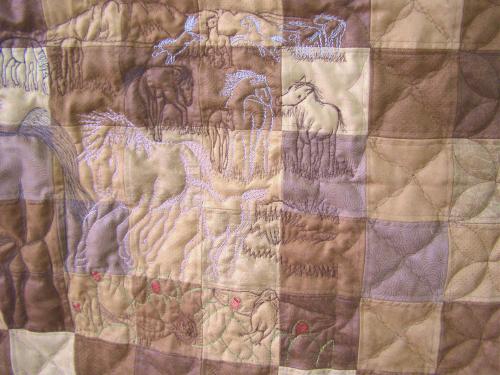
If you notice, only the 2 center blocks have a dark red border all around it. and the top and bottom borders are narrower than the sides. she was making it to fit her bed. 

front.jpg.71b7dd38a29f685a41cff345e61c560a.jpg


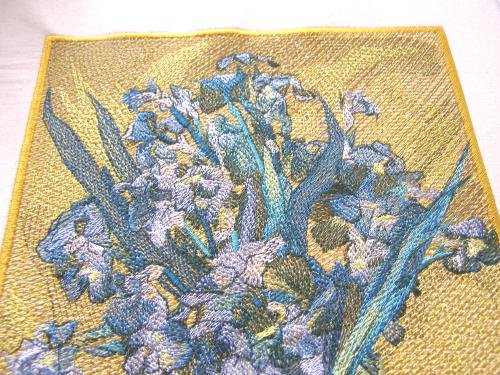
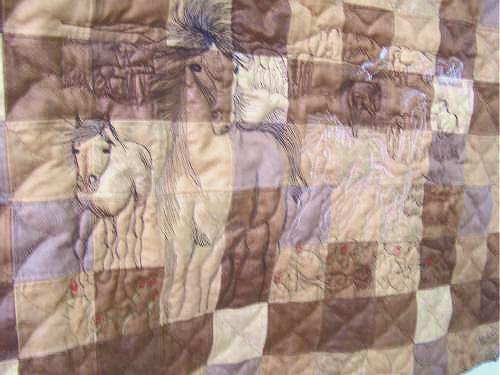
These are the old fashioned embroidery blocks that are about 16" square. She embroidered them with 2 different reds.....then sewed red fabric over the white fabric around the star.

497720324_blockclose.jpg.ef76372546e0ef0697551f63b097da61.jpg


block.jpg.e28f2977418932921974b344ea19e49c.jpg

And even added little squares of red fabric around the edges. I quilted on the very edge of all her pieces to hold them down better.  The quilting really does not show at all....not even hardly in person. 

emb.jpg.de7f80116df0c67b9b6acea01df6943c.jpg

Her border is sparkly. haha

border.jpg.0e80de73254afcd588e9f312fae8aded.jpg

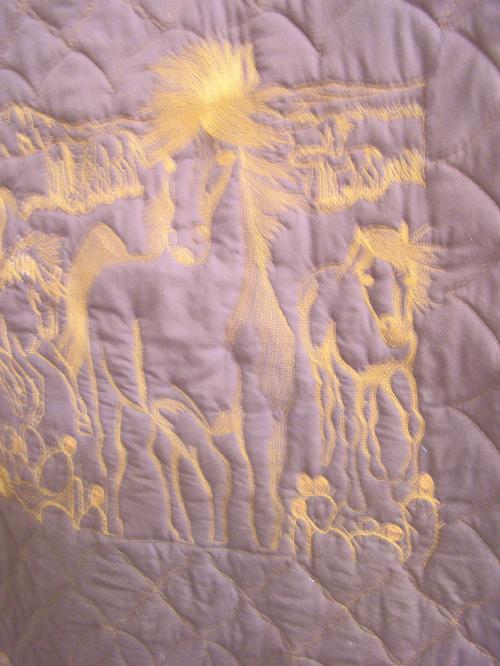
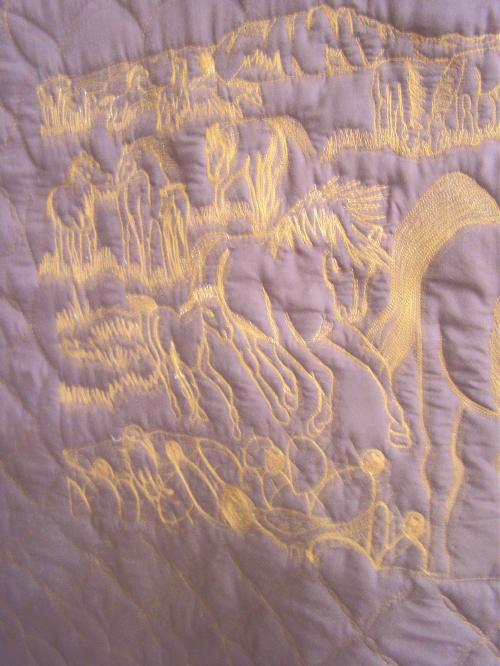
The back is darker than this photo, but it's the best i could do. you can sorta see the white quilting here around the star and around the little blocks in the border. 

back.jpg.6057754da7d5db34ebb5c65f9d513b93.jpg

I will take it to her Thursday and she will do the binding on it. 

Red and white Glide thread for the top and So Fine for the bobbin.

Tuesday, September 21, 2021

Van Gogh Iris

 What a difference it makes when you learn the tricks. 

My sister got another design for me to embroider for her....Van Gogh's Iris.  It went off without a hitch. And look how straight and even that is. Look at those T pins around the frame....that is the trick.

done.jpg.a55a94a655499ce9e1ac96060a48bc55.jpg

It's quite a trick in itself to get those suckers in there.

2049102852_pin2.jpg.fb11880930778d7c4e157c9240dd98dc.jpg

I put 3 on each long side and 2 on each short side of the frame.

pin.jpg.d9b86c9c3c962259748679d7f2f45a5d.jpg

The pins are fatter than regular pins, put the "T" helps keep the fabric and stabilizer from pulling out of the frame.

pin3.jpg.0ad263d16cc43bd4867dc42cc75d5356.jpg

35 color changes....4 1/2 hours to stitch. This one is 8x10"

bottom.jpg.c3146d0cdd02e983d529096e159cdd90.jpg


top.jpg.3d651b6a6cc20490269bcd66543930cd.jpg

Even after taking it out of the frame, it still is straight and not puckery. You can be sure I will remember this when embroidering large designs.

2073350672_outofframe.jpg.08ab93c258964be0536cd3c16609835f.jpg


Thank you, Sandy for the video by John Deere with the T pin trick. You are my new best friend. haha

Van Gogh Sunfloweres

 My sister bought this design and had me embroider it for her.  i enlarged it from 8x10 to 9x12 so she could frame it and hang it on her wall. 

It took 5 hours to embroider and used 5 bobbins of 90 weight thread. There were 18 different colors and 35 thread changes.

pic.jpg.3d0aae90b161515e63b10a07f3cdb277.jpg

It took 2 hours just to embroider the background. 

1.jpg.dc940bb80c6a0a851d82c490c277bfa0.jpg

I hope she likes it....I'm sure she will. 

2.jpg.b48460b42357d1a77844a688f531b0e3.jpg

I used the original colors called for in the design. wonder why Van Gogh made that one sunflower blue in the middle.

3.jpg.22c945e55ad2fc39dae258cb0e7cdaf3.jpg

The only thing I don't like about large designs is that you can never keep it tight enough in the frame to prevent it from moving with such dense stitching. the larger the frame, the harder it is to keep straight. 

I used a heavy stabilizer and a heavier than normal cotton fabric.

I'm going to visit Friday, so she'll get it then. I'm going to make her wait to see it. haha

Friday, September 10, 2021

You have not sewed.....

 ...until you have made a doll purse.  a 2" x 3" cross body purse.....with 3 pockets....and box pleats.  A little hint....when the instructions cover almost 30 pages.....it's going to be a ......... (supply your own word). haha

The finished purse.  And...it is lined, too.

purse.jpg.c1a045d5106dffeb10fa371d45242f76.jpg

Front pocket under the flap....with a little pleat on the bottom....and an elastic top.

71486574_flappocket.jpg.0096d324ab20ec0e312cecdeb1d91375.jpg

Open the flap to another pocket on the front of the purse.

2118765653_frontpocket.jpg.f4fcac8c33c486e34a59d2181273079e.jpg

And then...inside is another wee pocket on the back side. 

inside.jpg.a624af58c2cd295f0a6e525f4c62540b.jpg


But, I know Norah will love it. But....bless my heart....there are 2 dolls....and I KNOW she will say where is a purse for the other doll.  So, I will make another one....but....it won't have box pleats....or elastic in that front pocket.  Hell, I just had an idea. If i fuse the lining to the front fabric, I won't have to do a lining separately.....because....at the end....you STUFF the whole purse, handle and all, into the little lining and sew around the top.

Well, that does not work with pins, so i hand sewed it down...took out the pins....then sewed it by machine.   then.....turn that sucker out through a 1.5" hole in the lining to get it right side out. all of a sudden, that 2" purse seems like a 6" purse. hahahha

I'm gonna do some mindless sewing before I tackle the second one.

Tuesday, August 24, 2021

Butcher Shop Quilt

 This is the second quilt for the butcher shop in town. It is about 35" square.  Some applique animals and some embroidery blocks. The border fabric with the animals and the cuts marked is my favorite part. haha

front.jpg.b7496d2480ae6c4d9c6f10671aa8f3a7.jpg

front and center...the chef

cook.jpg.28ef1834ba19f8b411302e3a69cab950.jpg

Adam has fish for sale, too

fish.jpg.d42fa3b397d48ef2aeffd0a7ec4ef722.jpg

Lots of things to grill

grillin.jpg.418e49aca595d389e09f5a31d8a63363.jpg

He can make it hot

hot.jpg.bd19e1258343b49bf2aa5e958186525d.jpg

He makes pretty kabobs

kabob.jpg.1fed6d6dad75cbca54fc72933374e8bf.jpg

Stuffed chicken breast is awesome

chicken.jpg.611100ef5bdcf1beecc5e828eda2f8cb.jpg

Now I know where the ground chuck comes from. haha

cow.jpg.2ec5d825c6471a601e449180140be8d1.jpg

Ribs and loin are my favorite parts

pig.jpg.a3b6d7f67ac254dac21336d38af81460.jpg

I don't do lamb. I haven't seen this in the shop

sheep.jpg.eac6cfd1a3597bd276f5571e53350257.jpg

The back is a black and i used black thread, so you can't see it. but, you do see where the top white thread came to the back sometimes. my APQS is not right yet.

back.jpg.d2dfcc74bdc61c8f1abe1c37726c8a05.jpg

They truly loved the guitar quilt...Beth cried. I'll bet they like this one, too. I'll be delivering it this morning.

Friday, August 20, 2021

RED baby quilt

 Edith (Evie) Evilyn was born 2 days ago, so, I'm not too late with her quilt. I asked momma if she had a color in mind, and she asked if the main color could be red. OK....I got this.  I had already decided it would be crazy quilt blocks done on the embroidery machine. My cousin said she is the unconventional child, so I hope this fits her idea of a red baby quilt. haha

Red it is.

front.jpg.e42382edea842e796ef005ca7e334c20.jpg

I mostly did the blocks that had a middle piece. I put kid fabrics in the middles....and used the main color of the middle piece for the embroidery designs and the edges of the pieces.

1.jpg.7d560ff60908ba0b7a9ba07fd8fe7fe6.jpg

I didn't do the spider with the web. didn't want to scare a little kid. haha

2.jpg.f7cd996651da26ef27abb80de4d46a36.jpg

I like little froggy.  And I think the embroidery fan is pretty cool.  I didn't do all the embroidery designs, just depending on what it was and the kind of red fabric in that space.

3.jpg.8b05461be60edeca8e4b4806603c5fb6.jpg

The quilting was wavy lines across and down. I did the edges of the block and twice through the blocks.

4.jpg.234248d17a758a6cd0b6ce7abaf9b278.jpg

There are lots of different shades of red...even some pink. I used a spool of red thread...and then switched to a maroon. 

5.jpg.f034d8b505f79ad3c1319c2aaadbc79e.jpg

I had to do this whole scene with the bees

6.jpg.f0a408851beeec56e73dd0d506c94d42.jpg

You gotta have a few monkeys

7.jpg.c7e794e82cf05070edbab373ad3e9106.jpg

And the back is more monkeys....flannel monkeys at that. 

back.jpg.232c4a4635dde969878003172db330c8.jpg

I'm not sure the baby would want to lay on the red side, it might be a bit scratchy with all that embroidery, so the back is nice and soft.

If I remember correctly, the size came out to be about 42x49.  I mailed it off today.  And got a pic of baby Evie from momma. She has some fat cheeks. haha

Monday, April 26, 2021

Leather Horses

I found this piece of leather in my son's 'stuff' when we cleaned out his house after he died. I decided to keep it and finally used it. This is the picture....from my Uncle Johnny's stash of leather books and patterns.

pic.jpg.0eab67365263a4b1e74859241b313df9.jpg


This is my leather quilt. I had a hard time taking pics of it. It is 40 x 55". 

front.jpg.8b21616c2b20924e2aabdc09c5387f6a.jpg

I tried to make it easier to see....I am not a master of Photoshop. haha

681312930_close1.jpg.68a08a78aedef89e774a54226d1d7d90.jpg

I made different color horses....and left a few of them out.

2038608396_close2.jpg.a703bc5eb913a598209f990641bca984.jpg

This pic was with the flash on the camera.

724584331_frontwflash.jpg.4c3861c6525df35f87952af59da35098.jpg

Hubby likes the back better than the front.

back.jpg.107d518daa891a6ada5fc944cd10ed47.jpg


The back fabric is a dark brown and the thread is a light brown. My camera and I are not friends.

2037460958_back2.jpg.df2b6fcb49187436b5f514bd294558ab.jpg


1796089650_back3.jpg.c62460bb3c8802a640e61d3417629ea6.jpg

I am going to hang it in my hubby's man room. haha 


Saturday, April 3, 2021

Project....Horses

 This month my quilting project is to quilt this picture....


here is the other side of it...


on this piece of leather....


The leather is 40 x 55 inches. Those are 5 inch squares someone sewed together. I found it at my son's house when we cleaned out after he died. Since he lived in Texas most of his life and liked horses, it will be in his memory. 

The picture will be in the middle and there will be 2 rows of squares all around that. Don't know yet what will be in the border.

I will use my laser light and treat it like a panto. Hope that idea works. I spent this morning sewing down the edges of the blocks that were sewn with 1/2 inch seams and going every which way. 

Wish me luck


Search This Blog